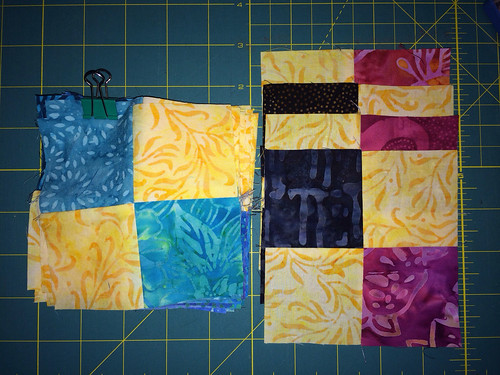
I'm almost done with Kathy Shaw's Intermediate 101 Piecing class. This is a prerequisite for her future intermediate classes such as dyeing and stumpwork among other things. We learned about colors, designing blocks and block construction. I still have the last task to do (sew fabrics into a block) but it won't take long. Just have to find the muslin again (or buy more).
Triad (3 colors equidistant from each other on the color wheel)
MishaMichele
....Life at Cascadia
Tuesday, March 3, 2015
Monday, March 2, 2015
VOS Retreat
Every February since 2009 I've flown to Phoenix for a few days to spend a long weekend with 31 of my quilty friends. This year I went a day earlier than before (as did many retreat attendees) and we spent that extra time shopping for goodies. I went to SAS for the first time and also a shop called Family Needlework where I found a great display of silk ribbons. I wanted to get one of everything, but restrained myself.
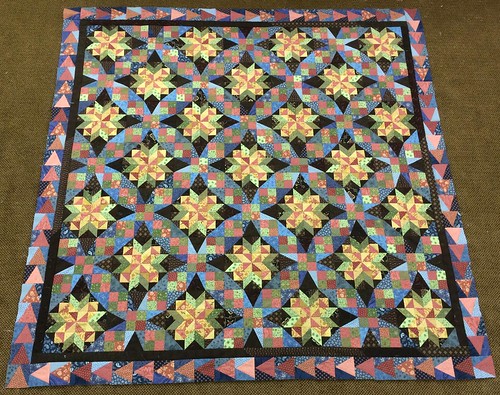
Above is a picture of my Celtic Solstice quilt, which finally received its borders. I left it with Ami to quilt on her long arm. I chose not to put the final (plain) green border on mine. It was plenty big enough for me as it was. I will most likely bind it with the same dark browns that I used for the inner border. I understand that this former mystery will soon be a published pattern in one of Bonnie Hunter's books coming out later this year.
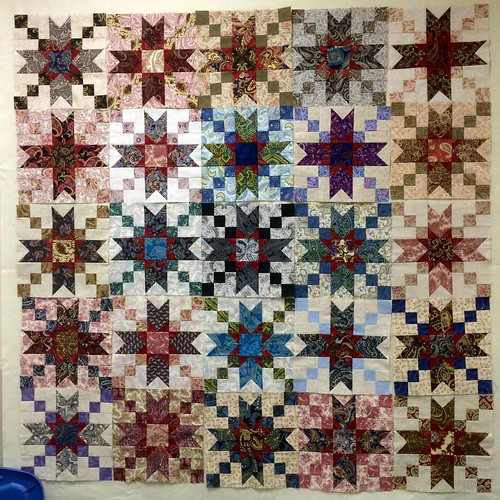
And here is the layout we decided on for Hot Paisley Mess. Ami offered to help me arrange the blocks (how could I pass that up?!) and agreed that it looked good with the black and white block in the center. She then noticed that I had 4 blocks that had a lot of teal/aqua in them and we pulled those toward the center. We then finished the center with 4 of the lightest blocks. It looks like it's glowing now! While in AZ I did manage to sew most of it together, I just have one long seam now to join the 2 parts, and then I can work out a border. I used roughly 70 of the 100+ paisleys from my collection, and am entertaining the idea of adding a piano key border and trying to incorporate most if not all of the paisleys into that. We shall see. Pattern is Jared Takes a Wife, a freebie from BH.
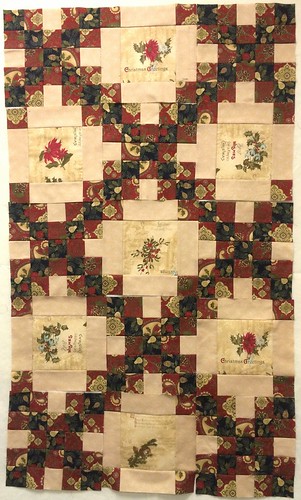
During the retreat, we also worked on a mystery quilt. It turned out to be a Double Irish Chain pattern, and was hosted by Linda P. I fussy cut some blocks from a print, but if you look closely you'll see that the words run every which direction and not always the same side "up" as the graphic closest to the words. This caused some in the room to have small fits as they tried to "fix" the orientation, LOL. Now I think they understand why I had my blocks set up going all directions to begin with. I will get back to this soon to finish the borders, as I have it all cut out, I just didn't have time during retreat with all the shopping, talking and having to get CS done first so I could hand it off to Ami.
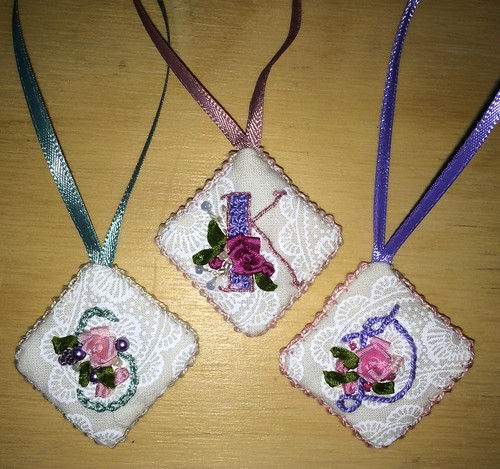
I also made some little hostess gifts this year for Carolyn, Cathy, Ellen, Kim, Denise, Laura, Sharon and Pat. They finished at about 1" across, and are hand embroidered. They can be used as scissor fobs or just for decoration.

Above is a picture of my Celtic Solstice quilt, which finally received its borders. I left it with Ami to quilt on her long arm. I chose not to put the final (plain) green border on mine. It was plenty big enough for me as it was. I will most likely bind it with the same dark browns that I used for the inner border. I understand that this former mystery will soon be a published pattern in one of Bonnie Hunter's books coming out later this year.

And here is the layout we decided on for Hot Paisley Mess. Ami offered to help me arrange the blocks (how could I pass that up?!) and agreed that it looked good with the black and white block in the center. She then noticed that I had 4 blocks that had a lot of teal/aqua in them and we pulled those toward the center. We then finished the center with 4 of the lightest blocks. It looks like it's glowing now! While in AZ I did manage to sew most of it together, I just have one long seam now to join the 2 parts, and then I can work out a border. I used roughly 70 of the 100+ paisleys from my collection, and am entertaining the idea of adding a piano key border and trying to incorporate most if not all of the paisleys into that. We shall see. Pattern is Jared Takes a Wife, a freebie from BH.

During the retreat, we also worked on a mystery quilt. It turned out to be a Double Irish Chain pattern, and was hosted by Linda P. I fussy cut some blocks from a print, but if you look closely you'll see that the words run every which direction and not always the same side "up" as the graphic closest to the words. This caused some in the room to have small fits as they tried to "fix" the orientation, LOL. Now I think they understand why I had my blocks set up going all directions to begin with. I will get back to this soon to finish the borders, as I have it all cut out, I just didn't have time during retreat with all the shopping, talking and having to get CS done first so I could hand it off to Ami.

I also made some little hostess gifts this year for Carolyn, Cathy, Ellen, Kim, Denise, Laura, Sharon and Pat. They finished at about 1" across, and are hand embroidered. They can be used as scissor fobs or just for decoration.
Crazy Quilting Class Finished Block
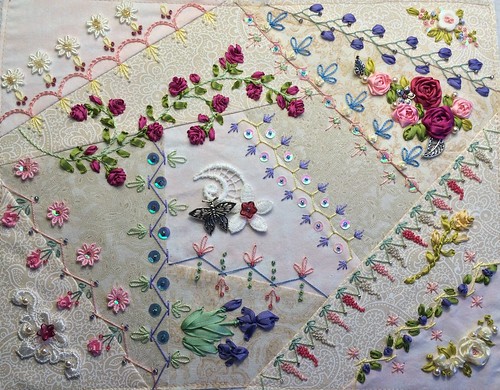
It occurred to me today that I never posted anything here about my finished block. I was rather busy in mid-February finishing this so I could concentrate on getting ready for the VOS Retreat in Phoenix, as I knew the registration for the Intermediate class with Kathy Shaw was coming up soon after I returned home.
I added some lace, a few more ribbon roses, some larger colonial knots (with size 5 perle), a couple of charms, several sequins and a lot of beads.
I have just started the first installment of the Intermediate Crazy Quilting Class this past weekend, and am almost through it already. I'll make a separate post about that.
The next sign ups for this free class are March 20-22, so don't miss out!! Here's a link to her blog for more info on her classes: Shawkl.com
Saturday, January 31, 2015
Kathy Shaw Crazy Quilt Class
My friend Brigitte (from the about.com quilt forum) posted recently about a free class that was coming up to learn crazy quilt embroidery. I signed up at the last minute and boy am I glad I did! Several other gals on the forum also joined, and 5 of us are VOS retreat attendees so in February we'll all bring our projects to have a mini show & tell.
I had purchased a number of spools of silk ribbon from Thread Art a few years ago with the intent of learning silk ribbon embroidery, but was discouraged by how difficult it was for me to pull the needle through the fabric with the ribbon. Luckily for me, Kathy's technique is more of a stab & pull (working front to back and then to the front again) instead of stitching from one side and this made a world of difference for me. I still need to take frequent breaks (I have chronic tendonitis or tendonosis in both hands/wrists), but it's quite manageable.
Class started less than 3 weeks ago and I'm already through all the tasks except for the last one, which involves adding beads, lace and other 3D elements. I'll share some pictures below of the various processes and tasks that were executed in the class.
If you'd like to watch Kathy's site to see when her next free classes will be held, it's shawkl.com
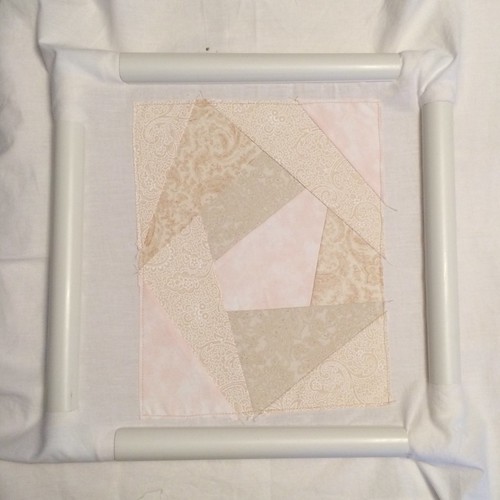
Here is my base block in the frame, ready to be adorned. Kathy provides templates that you print out and then punch holes in the designated places to make marks on the fabric. This helps you to learn even spacing to get nice results. The class is VERY structured, so be prepared to follow her directions carefully so you can learn her techniques. You must complete each task and post it to the (private) class blog before you receive the next task. Once the entire class is completed, you have the option to sign up for other free courses through her of an intermediate level. I can hardly wait!
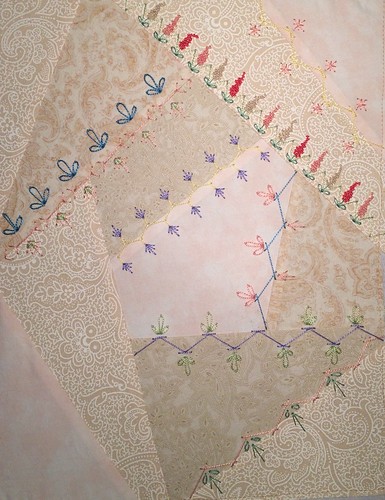
These were the first few seams we sewed. You can see my pencil dots in some places that will later be covered with beads, french knots or other decorations. Click any of these images to go to my Flickr page for better detail.
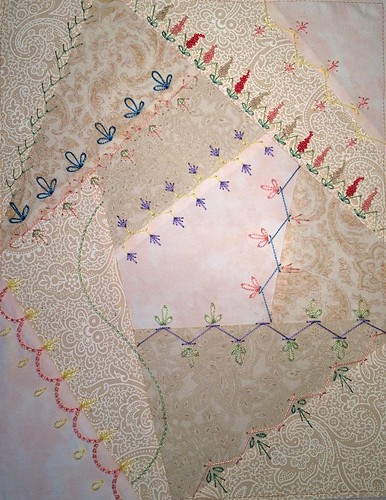
Here you see the rest of the seams have gotten their initial treatment. All of this so far is done with DMC perle cotton, mostly in size 8 but I also bought a few in size 12 as well. I was pleasantly surprised at how nice the perle was to work with, as I'd only used DMC floss previously. Kathy strongly recommended the perle and I'm so glad I listened. It has a very nice sheen and was really user friendly.
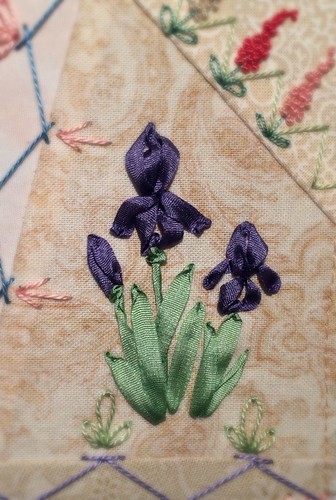
Now that the initial perle cotton work is done, it was time to play with those silk ribbons! Most of the work is in 4mm, including the iris. My test iris actually looked a little better than the finished one, but I'm still ok with this version too. The color looks much darker in photographs than it does in real life. It's actually a soft periwinkle color of YLI brand ribbon.
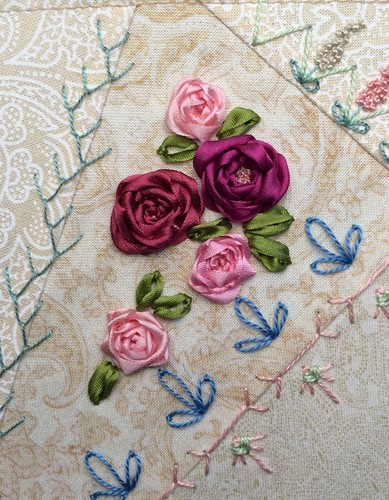
Here was the 2nd task using the ribbon. Here the darker roses are made with 7mm silk, some from Thread Art and some was some Bucilla I bought a million years ago. I will be adding more to this section soon, which is why it seems to be a little "open".
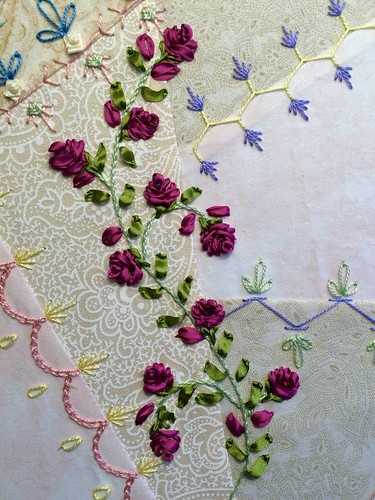
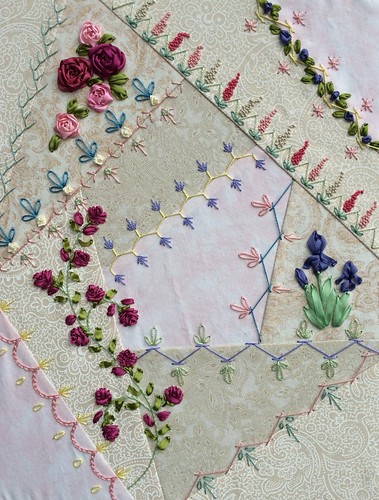 At the top of this post you saw the close up of the vine, which was the last seam we worked on. This is done with a french knot, and then a series of fly stitches under it to give it the appearance that you're viewing the rose from the side. The original instructions didn't include any buds, I added those myself. I also changed up the leaf pattern a bit. I had sketched something out at work earlier in the week (but accidentally made it a mirror image of the curve we'd drawn).
So here's what the entire block looks like at the time I'm writing this. On my way home today I stopped at Threadneedle Street in Issaquah and bought two more shades of green silk in 4mm (they didn't have any 2mm or 13mm unfortunately), and several more balls of perle cotton to play with on this and other future projects.
Hope you enjoyed my pictures, please let me know if you have any questions.
I had purchased a number of spools of silk ribbon from Thread Art a few years ago with the intent of learning silk ribbon embroidery, but was discouraged by how difficult it was for me to pull the needle through the fabric with the ribbon. Luckily for me, Kathy's technique is more of a stab & pull (working front to back and then to the front again) instead of stitching from one side and this made a world of difference for me. I still need to take frequent breaks (I have chronic tendonitis or tendonosis in both hands/wrists), but it's quite manageable.
Class started less than 3 weeks ago and I'm already through all the tasks except for the last one, which involves adding beads, lace and other 3D elements. I'll share some pictures below of the various processes and tasks that were executed in the class.
If you'd like to watch Kathy's site to see when her next free classes will be held, it's shawkl.com

Here is my base block in the frame, ready to be adorned. Kathy provides templates that you print out and then punch holes in the designated places to make marks on the fabric. This helps you to learn even spacing to get nice results. The class is VERY structured, so be prepared to follow her directions carefully so you can learn her techniques. You must complete each task and post it to the (private) class blog before you receive the next task. Once the entire class is completed, you have the option to sign up for other free courses through her of an intermediate level. I can hardly wait!

These were the first few seams we sewed. You can see my pencil dots in some places that will later be covered with beads, french knots or other decorations. Click any of these images to go to my Flickr page for better detail.

Here you see the rest of the seams have gotten their initial treatment. All of this so far is done with DMC perle cotton, mostly in size 8 but I also bought a few in size 12 as well. I was pleasantly surprised at how nice the perle was to work with, as I'd only used DMC floss previously. Kathy strongly recommended the perle and I'm so glad I listened. It has a very nice sheen and was really user friendly.

Now that the initial perle cotton work is done, it was time to play with those silk ribbons! Most of the work is in 4mm, including the iris. My test iris actually looked a little better than the finished one, but I'm still ok with this version too. The color looks much darker in photographs than it does in real life. It's actually a soft periwinkle color of YLI brand ribbon.

Here was the 2nd task using the ribbon. Here the darker roses are made with 7mm silk, some from Thread Art and some was some Bucilla I bought a million years ago. I will be adding more to this section soon, which is why it seems to be a little "open".
 At the top of this post you saw the close up of the vine, which was the last seam we worked on. This is done with a french knot, and then a series of fly stitches under it to give it the appearance that you're viewing the rose from the side. The original instructions didn't include any buds, I added those myself. I also changed up the leaf pattern a bit. I had sketched something out at work earlier in the week (but accidentally made it a mirror image of the curve we'd drawn).
So here's what the entire block looks like at the time I'm writing this. On my way home today I stopped at Threadneedle Street in Issaquah and bought two more shades of green silk in 4mm (they didn't have any 2mm or 13mm unfortunately), and several more balls of perle cotton to play with on this and other future projects.
Hope you enjoyed my pictures, please let me know if you have any questions.
Friday, December 19, 2014
Grand Illusion - Parts 4 and 5
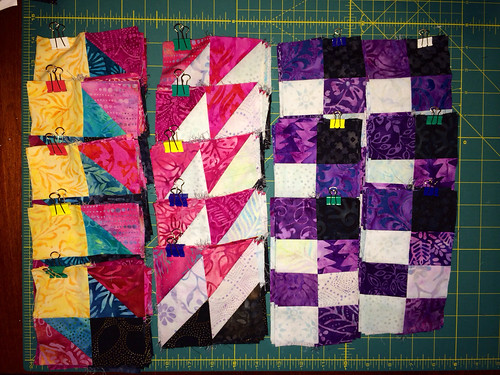
Can hardly believe it, but I'm all caught up! Here are the first 3 parts, all counted and stacked up. I had finished the chevrons earlier in the week and got a good start on Part 3. Paired up and sewed the rest of Part 3 today before even starting Part 4...not how I usually do things but I was in the mood to "complete" something.
And here's Part 4, all done as well. Probably shouldn't have done so much in one day but I was on a roll. Going to go ice my wrist now and watch some TV to keep me out of trouble!
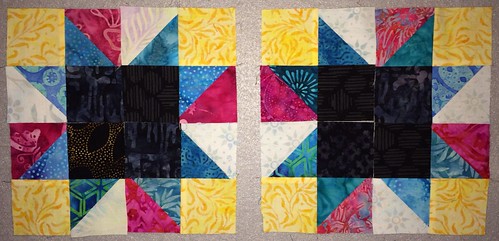
Link to Quiltville/Bonnie Hunter and the Grand Illusion pattern info
Edited Dec 26th...Mystery Monday Link Up FAIL, hahaha I forgot to come back and do the linky and now it's too late ::sigh::
Edited again Dec 28th...well, since I missed the previous linky I may as well try to combine these for tomorrow's linky instead. Here's Part 5. Not much to say about it, except that I really like the turquoise and the yellow together. Even though I've been making half the parts on this journey I went ahead and made all the 4 patches requested in Part 5 and will use leftovers for something else.
Mystery Monday linky return:
Sunday, December 14, 2014
Grand Illusion - Part Three
This will be short and sweet, as I did too much this week and aggravated my tendonitis :(
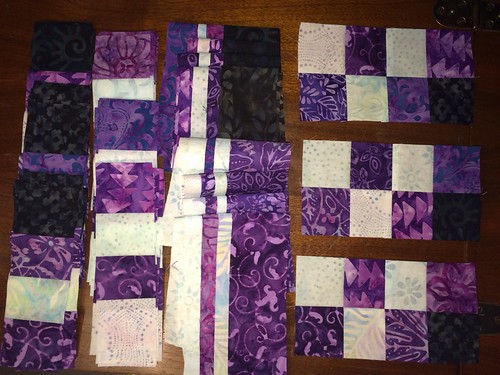
Swapped purples for the greens. Just sewed up enough to make sure I liked it. Not quite as dark as the picture.
Link to Bonnie Hunter
Link to Monday Link Up
Swapped purples for the greens. Just sewed up enough to make sure I liked it. Not quite as dark as the picture.

Link to Bonnie Hunter
Link to Monday Link Up
Sunday, December 7, 2014
Grand Illusion - Return of the Chevrons!
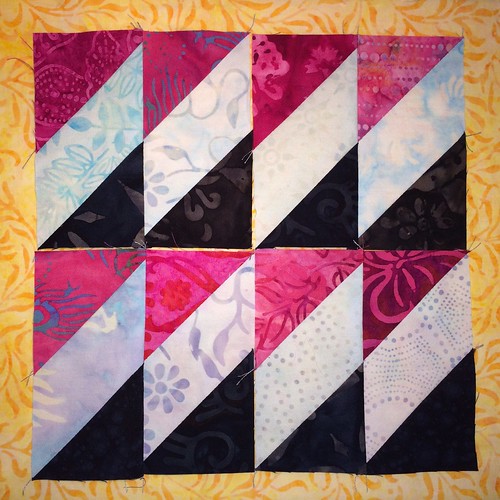
So many of us had a hard time with these units when making Celtic Solstice, but I must say I finally got the hang of it after a few hundred squares, LOL. In fact, Hot Paisley Mess (still not a top yet) has a lot of these sew & flip corners as well.
Here's Part 2 of my GIMQ (the "MQ" is added because "GI" just looks funny). I'm loving the pink and black together. We haven't dipped into the greens yet, and part of me wants to switch mine to light purple instead...we'll see where the future clues take us I guess, and I'll make a decision then.
Link to the instructions (only available for a limited time)
Link back to the Mystery Monday Link Up
Saturday, November 29, 2014
Grand Illusion - Part One
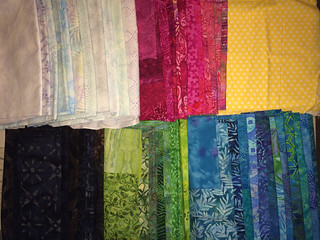
So...here we are again...LOL. For this year's mystery I decided to mostly follow Bonnie's colors. I went a bit richer with three of them, however, and decided my neutrals will actually be pastel batiks. I toyed with the idea of substituting something else for the yellow, but then I found one that I liked at Pacific Fabric and decided to go for it.
Here is my palette, minus the yellow (I put a polka dot yellow in the pic to hold the spot)
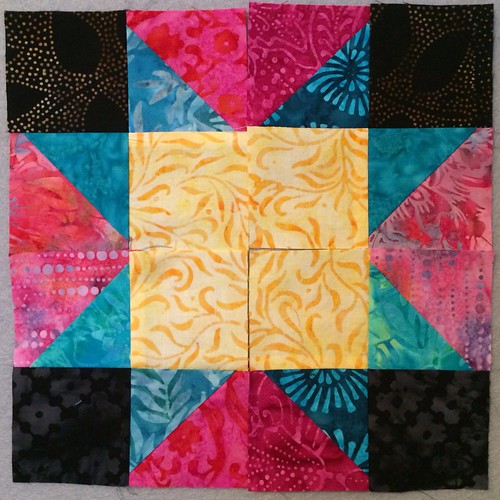
...and here are my first 4 blocks for the first clue. I have quite a few more of the HSTs made (nearly 100) but have some other things I have to work on today so I'm setting it all aside for a little while. I will be making half of the units to begin with, for a smaller quilt. Mine will be roughly 60" square depending on border, vs 88" for Bonnie's original.
Here's the link back to Bonnie's blog, and here's the a link back to the Monday Link Up as well: http://quiltville.blogspot.com/2014/12/mystery-monday-link-up-part-1.html
Here is my palette, minus the yellow (I put a polka dot yellow in the pic to hold the spot)

...and here are my first 4 blocks for the first clue. I have quite a few more of the HSTs made (nearly 100) but have some other things I have to work on today so I'm setting it all aside for a little while. I will be making half of the units to begin with, for a smaller quilt. Mine will be roughly 60" square depending on border, vs 88" for Bonnie's original.

Here's the link back to Bonnie's blog, and here's the a link back to the Monday Link Up as well: http://quiltville.blogspot.com/2014/12/mystery-monday-link-up-part-1.html
Monday, September 29, 2014
Around the World Blog Hop
I was invited to participate in the Around the World Blog Hop by Brigitte from the about.com forum. It sounded like fun, so I quickly said "sure!" Then I promptly forgot about inviting others to play along. Whoopsie!
I sent out three invitations on Saturday. One to Ami Krenzel, a friend and longarmer extraordinaire who just recently returned to the quilting world after a far too long hiatus. Another invite went to the (in)famous Pirate aka Shelley Rodgers, who I've had the pleasure of meeting several times as we attend the same retreat each year. I've even been to her house, and fed her chickens! The third invite went to my friend and almost neighbor Samantha who blogs more about her pets than her quilting but since her pets are absolutely adorable I really can't hold it against her ;)
Update: (as I'd typed this up in advance)...Ami and Samantha have replied that they'll participate, while Shelley had to decline. I sent another invite out to Suze, who also attends the same retreat. We both have an affection for painting and for working on things in smaller scale. I haven't heard back just yet, but am including her blog link here in case she says "yes" :)
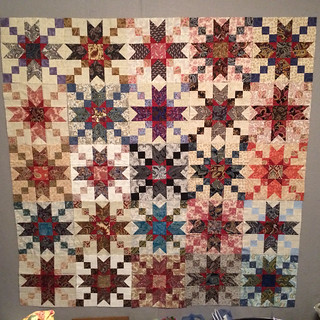
Lately I've been making blocks based on Bonnie Hunter's Jared Takes a Wife, a free pattern from Quiltville. But to put my own special twist on it, every fabric in this quilt is paisley! I've made 26 or 27 of them, and now they're aging while I decide how to set them. It's quite likely I'll not sash them, as I like how they look together...but I need to consider putting them on point or what to do for borders, etc. There are roughly 65 different paisley fabrics in the project so far, and I have over 50 more that I could use in borders or setting triangles.
Here's a (slightly out of focus, sorry) photo of the design wall. I haven't sorted them yet, so no need to wonder why it looks so muddy in the lower right section ;)
Here's a link to the full album on my Flickr page if you'd like to see the blocks/fabrics in detail.
Ok, now for the questions!
1. What am I working on?
The above project, Bonnie's 2013 Celtic Solstice Mystery (finally got the 49 blocks sewn to each other, still have to do borders), today I was quilting on a baby quilt for my friend Cassandra, and in my purse I have EPP Hexies that I'm using to create a cover/sleeve for my Kindle.
2. How does my work differ from others of its genre?
I'm not so sure that it does, but not many are as obsessed with paisley as I am ;)
3. Why do I write/create what I do?
I've always been interested in art, and over the years I've worked in many mediums including acrylic and beads (mostly jewelry). If I don't have a project to work on, I go a little stir crazy. This is one of the things I like so much about quilting...I can bring it with me and work on it almost anywhere that I have light!
4. How does my writing/creating process work?
I love to get inspired by things I see online or in shops. Other times it's just a particular fabric that I have to have...and then I see where things go. I love trying different color combinations out, and am particularly drawn to cool tones.
Ok, there you have it. I did it, Brigitte! Now I hope the others are willingvictims I mean participants ;)
I sent out three invitations on Saturday. One to Ami Krenzel, a friend and longarmer extraordinaire who just recently returned to the quilting world after a far too long hiatus. Another invite went to the (in)famous Pirate aka Shelley Rodgers, who I've had the pleasure of meeting several times as we attend the same retreat each year. I've even been to her house, and fed her chickens! The third invite went to my friend and almost neighbor Samantha who blogs more about her pets than her quilting but since her pets are absolutely adorable I really can't hold it against her ;)
Update: (as I'd typed this up in advance)...Ami and Samantha have replied that they'll participate, while Shelley had to decline. I sent another invite out to Suze, who also attends the same retreat. We both have an affection for painting and for working on things in smaller scale. I haven't heard back just yet, but am including her blog link here in case she says "yes" :)
Lately I've been making blocks based on Bonnie Hunter's Jared Takes a Wife, a free pattern from Quiltville. But to put my own special twist on it, every fabric in this quilt is paisley! I've made 26 or 27 of them, and now they're aging while I decide how to set them. It's quite likely I'll not sash them, as I like how they look together...but I need to consider putting them on point or what to do for borders, etc. There are roughly 65 different paisley fabrics in the project so far, and I have over 50 more that I could use in borders or setting triangles.
Here's a (slightly out of focus, sorry) photo of the design wall. I haven't sorted them yet, so no need to wonder why it looks so muddy in the lower right section ;)

Here's a link to the full album on my Flickr page if you'd like to see the blocks/fabrics in detail.
Ok, now for the questions!
1. What am I working on?
The above project, Bonnie's 2013 Celtic Solstice Mystery (finally got the 49 blocks sewn to each other, still have to do borders), today I was quilting on a baby quilt for my friend Cassandra, and in my purse I have EPP Hexies that I'm using to create a cover/sleeve for my Kindle.
2. How does my work differ from others of its genre?
I'm not so sure that it does, but not many are as obsessed with paisley as I am ;)
3. Why do I write/create what I do?
I've always been interested in art, and over the years I've worked in many mediums including acrylic and beads (mostly jewelry). If I don't have a project to work on, I go a little stir crazy. This is one of the things I like so much about quilting...I can bring it with me and work on it almost anywhere that I have light!
4. How does my writing/creating process work?
I love to get inspired by things I see online or in shops. Other times it's just a particular fabric that I have to have...and then I see where things go. I love trying different color combinations out, and am particularly drawn to cool tones.
Ok, there you have it. I did it, Brigitte! Now I hope the others are willing
Saturday, May 31, 2014
Slacking on the Blogging...But I'm Still Quilting!
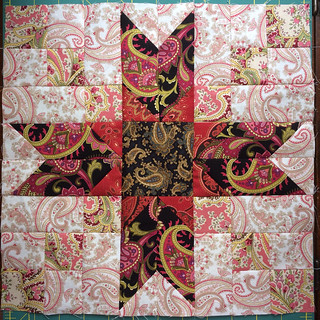
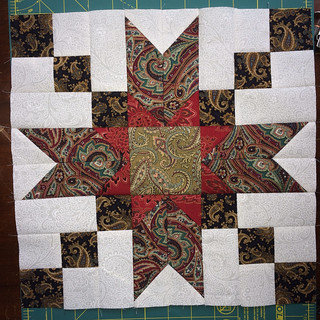
I haven't been very good about keeping up here, but I have been sewing a lot. Here's my latest project: a completely paisley quilt using Bonnie Hunter's Jared Takes a Wife block.
Here are the first two. I've since sewn one more and kitted up 11 others to sew while I'm in the city entertaining Phia (fka Ophelia).
Sunday, February 2, 2014
Celtic Solstice - First 9 Blocks
I'm afraid I've been busy working on other things lately that had deadlines, so I haven't had as much time to work on CS as I would've liked. I did get 9 blocks completed and sewn to each other recently, however, and here they are!
I swapped dark brown for the neutrals and pink for the orange. This was a fun mystery (as all of Bonnie's mysteries are!) and I look forward to participating again next year :)
If you'd like to download your own set of instructions (until June 1st, 2014) click here
To return to the linky, click here
Subscribe to:
Comments (Atom)


